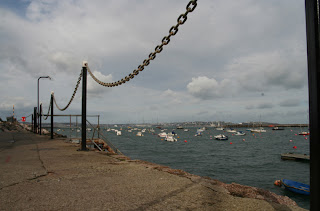
Ok this week I had loads of opportunities for practice as we were on an Autumn break in Dartmouth. No work, no housework, no school run, not even the distraction of FC as the internet connection was so dodgy; just ample opportunity for relaxing and practising my photography.
So practice I did. This week was all about colour and learning to use it as a tool in our photographs. The assignments read:
Go out with your camera and look for colour. Take photos close to subjects, so that the colours fill the frame – it doesn’t matter if the viewer cannot immediately tell what the subject is.
Consider the following guidelines:Look for images composed of vivid colours (highly saturated) as well as more muted colours.Look for complementary colours (those opposite each other on the colour wheel) and harmonious colour combinations.Consider images that consist of single colours and multiple colours.
Think about balance, unity, dynamism and focus of attention when composing and editing your images.
Once you have a selection of images use the cropping tool in Elements to remove areas of each image that don’t add to the impact of the colour. Then use any of the Elements tools, especially those that have been introduced in Session 5, to adjust, enhance or correct your images.
Upload six of your selected images to Open Studio for discussion among your group.
Seaside areas are generally quite good for colour...especially that lovely washed-out colour caused by being exposed to the elements. I found some lovely old dinghies; some flat-bottomed canoes, and plenty of buckets, spades and brightly coloured fishing nets. The results are below.
Stacked Dinghies
These faded and harmonious colours are all from one half of the colour wheel: from blue/green to magenta
Stacked Broad-based Canoes
Harmonious colours again, all from one half of the colour wheel: blue/green through to orange.
Red Dinghy
This was taken on a cloudy but bright day and the red dinghy stood out among all the white ones. I helped it along a bit by desaturating the background slightly in Photoshop.

Candy-coloured Fishing Net Poles
These were very pretty and made me think of the printers' primaries: cyan, magenta and yellow.
In week one I tried to photograph some of my son's brightly coloured marbles but they looked dull. So this week I made sure that we called in at The House of Marbles in Bovey Tracey. The factory shop and museum were quiet and as a result the staff were quite happy for me to set up my tripod and snap away...so I did. Marbles are such good subjects and I'm much happier with these shots.


Marble Blanks
 We also visited a pottery. There were very few people wandering round so we decided to take part in one of the short pottery lessons advertised. All three of us had a go; even our four year old! Manseur, the resident potter was a sweetheart and very patient and we each managed to produce a recognisable (sort of) small vase and a bowl, which we painted before they were fired. They've promised to post them to us when they're ready so if you know me and receive a wonky vase for Christmas you'll know why!
Manseur and his diddy apprentice
 In the pottery cafe there were some stacked, coloured crates which I thought might make a good composition for this assignment. The cafe wasn't busy so I assembled my tripod and took a few shots. I was packing up the tripod when I had the distinct feeling that someone was standing behind me. I turned and there were three other diners all taking the same photo either with hand held cameras or camera phones. Guess they thought they might be missing out...the power of the tripod: people actually think you know what you're doing! Here's the result.
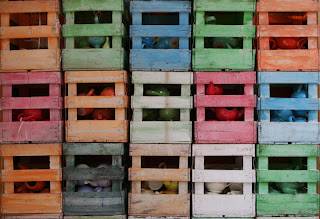 I had a similar experience when I was taking the chocolate box shot of the coloured dinghies for assignment 4. I set up my tripod quite low then crouched behind it to peek through the viewfinder. When I'd finished I realised that I had an elderly man with a camera crouched beside me. "You look like you know what you're doing," he said, "So I thought this was worth a shot." I didn't disillusion the poor fellow!
Of course there were loads of other general photo opportunities and I've posted some of the better ones below.
Gone Fishing

Sunrise through the Gate

Three Green Doors
I do like 'door shots' and this reminded me a little of one of the Flickr photos I chose during week 1

From The Level, at Dittisham
Another attempt at a story-telling shot

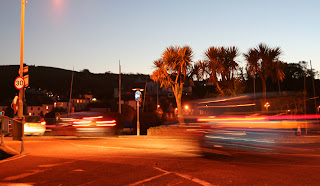
Exiting Higher Ferry
An attempt to capture motion using car head and tail lights.
Open Fire

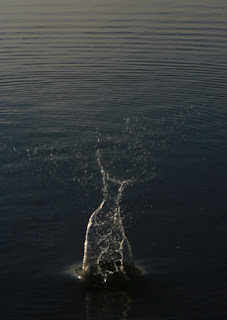
Frothy Waves
Another motion shot

Fish Relief
(As seen)

Brixham Mosaic
(colours enhanced slightly by using the saturation tool in Photoshop)

Break!
Another attempt at capturing motion